


Learn how to paint a ceiling with this ceiling painting guide

Ceiling Painting
Ceilings are not particularly fun to paint. However, it is not an impossible nor difficult task to paint your ceiling. With a few simple supplies necessary for the job, you can get started and finish most home ceiling painting projects in a day. A properly painted ceiling can make a huge difference on the appearance of your room. The right ceiling paint job can make a room look larger, cleaner and will give your space a complete refreshment.
Let’s get started with your ceiling painting project.
Have Enough Ceiling Paint?
First, you should make sure that you have enough paint. If you have a particularly large room, you may need more than one or two buckets of paint. However, most ceilings can be painted with two 1 gallon buckets. Some larger rooms (over 800 sq. ft.) may require more. If you want to be safe, go with a 5 gallon supply and this should be plenty, especially if you are painting more than one room.

Prep Your CeilingCeiling Painting - Step 1:
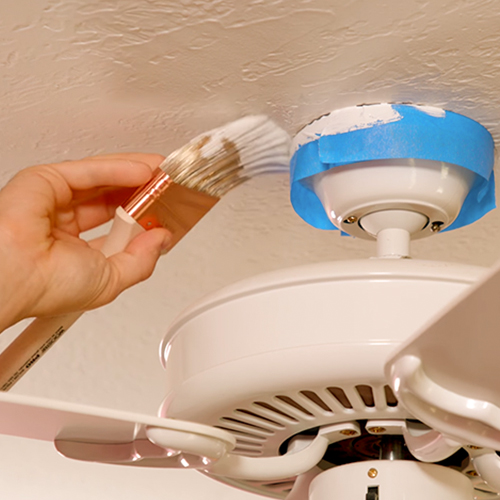
You want to protect the rest of the surfaces in your space from getting paint on them. Use tape, plastic coverings and drop cloths to ensure that you don’t make a mess. More protection won’t hurt and will save you from the trouble of getting paint on carpets or furniture. If you have a ceiling fan, tape it off at the base.
Prep Your PaintCeiling Painting - Step 2:
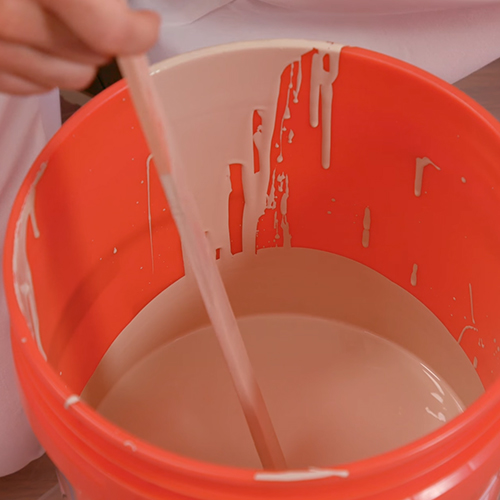
Next, start mixing your ceiling paint in a separate empty 5 gallon bucket to get your ceiling paint to the proper consistency.
Start Painting Your CeilingCeiling Painting - Step 3:
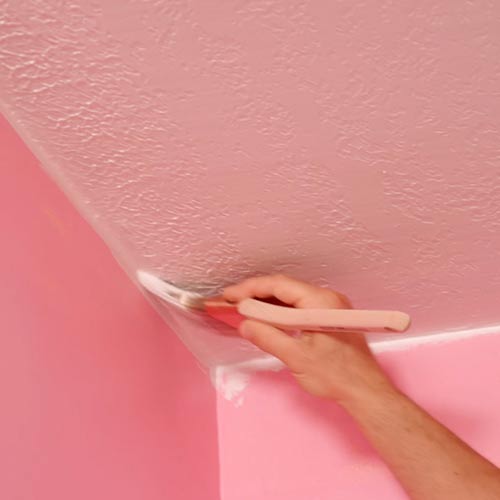
Start painting your ceiling with a brush in a corner of the ceiling. Start with painting areas of the ceiling that are not easy to reach with a roller. Work from a small bucket of paint. Hold the brush like a pen, load it with paint, tap the side of the bucket and you are good to begin painting your ceiling.
Refer to the product label, Technical Data Sheet (TDS) and Safety Data Sheet (SDS) for detailed safety and application instructions.
Applying Ceiling PaintCeiling Painting - Step 4:
Once you’re done getting all of the tight spots covered, you are ready to use your roller. Use a 9 inch roller and 3/8 inch nap on a flat ceiling. For a textured ceiling, try using a 9 inch roller with a 1/2 inch nap. Work in areas of three to four square feet, always painting back into wet areas to minimize a splotchy, inconsistent finish.

Finishing Your Ceiling Painting ProjectCeiling Painting - Step 5:
Once you cover the ceiling to best of your ability, let the paint dry as long as possible. Different paints have different dry times, and certain areas may dry faster so the longer you wait, the less likely you will encounter any problems. After your paint has dried completely, carefully remove your coverings and double-check for any inconsistent areas of paint coverage.